Tuesday, March 16, 2010
Fine Art Template
1. Tree: 2.6.10 @ 1:20 p.m.; Ucon, Idaho; f 6.3; /1600; Canon EOS Digital Rebel XS
2. Tire: 3. 3.10 @ 10:30 a.m.; Dubois, Idaho; f 4.5; 1/125; Canon EOS Digital Rebel XS
To create the fine art template, I opened a white Photoshop document. I then added a rectangle. I copied that rectangle four times and center aligned them. I then added a photo behind the rectangles. This was a very simple, yet professional way to show off a photo.
Tuesday, March 9, 2010
High Dynamic Range (HDR)
Stairs (overlay): 3.3.10 @ 4:40; Bannack, MT; f 4.5; 1/40; Cannon EOS Digital Rebel XS
1. Stairs1: Exposure -2
2. Stairs2: Exposure 0
3. Stairs3: Exposure +2
4. Scratches: 3.3.10 @ 4:45; Bannack, MT; f 5.6; 1/5; Cannon EOS Digital Rebel XS
Chair: 3.3.10 @ 3:40 p.m.; Bannack, MT; f 4.5; 1/50; Cannon EOS Digital Rebel XS
1. Chair1: Exposure +2
2. Chair2: Exposure -2
3. Chair3: Exposure 0
For each completed photo, I used Dynamic Photo to compile the three different exposures to create one image. I also added the scratches as an overlay for the stairs photo. I didn't use a tripod on that photo so it was a little blurry, the scratches were also blurred, but I thought it turned out to look pretty good.
Bannack, Montana
1. Building: 3.3.10 @ 10:30 a.m.; Dubois, ID; f 5.6; 1/400; Canon EOS Digital Rebel XS
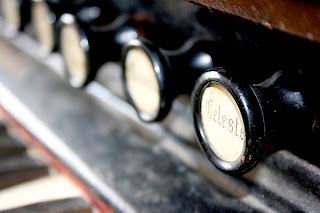
2. Organ: 3.3.10 @ 3:20 p.m.; Bannack, MT; f 5.6; 1/8; Canon EOS Digital Rebel XS
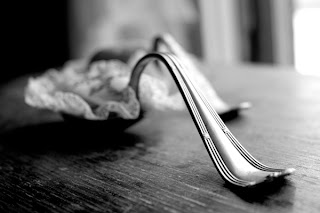
3. Spoons: 3.3.10 @ 3:25 p.m.; Bannack, MT; f 5; 1/125; Canon EOS Digital Rebel XS
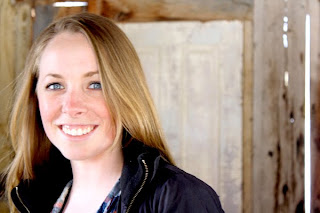
4. Paige: 3.3.10 @ 3:45 p.m.; Bannack, MT; f 5.6; 1/15; Canon EOS Digital Rebel XS
5. Andrew: 3.3.10 @ 3:40 p.m.; Bannack, MT; f 5.6; 1/80; Canon EOS Digital Rebel XS
6. Ghost: 3.3.10 @ 4:15 p.m.; Bannack, MT; f 11; 6 seconds; Canon EOS Digital Rebel XS; tripod used
In each photo I adjusted levels and saturation. I used gradient map and channel mixer to make the spoons photo black and white. In the ghost photo, I used a tripod. Paige stood in the photo for about 3 seconds, then ran out. The camera only caught an outline of Paige creating a ghost like effect.
Tuesday, March 2, 2010
Photolusion Blend
1. Jordan: 2.28.10 @ 11:25 a.m.; Rexburg, ID; f 4.5; 1/40; Canon EOS Digital Rebel XS
2. Apple Jacks: 2.28.10 @ 11:15 a.m.; Rexburg, ID; f 5.6; 1/40; Canon EOS Digital Rebel XS
3. Don't Eat Me
I found my creative inspiration for this photo from the movie "Honey I Shrunk the Kids." I thought it'd be fun to make my own version. First I took a photo of a bowl of Apple Jacks ready to be eaten. Then I took a photo of my husband, Jordan, pretending as if he was about to be eaten. I took it of him kneeling on the floor while I stood on the couch to give the appearance that he was being looked down on. Then I cut out Jordan's body in Photoshop and placed him in the spoon.
Photolusion Straight
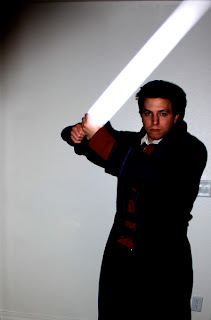
Jedi: 3.2.10 @ 6:30 p.m.; Rexburg, ID; f 4; 1/60; Canon EOS Digital Rebel XS
For this photo, I placed a stick of pencil lead right in front of the camera lens. Then, I had my "Jedi" place himself so it appeared as if he was holding the lead. I took the photo with the flash. This lit up the lead, making it appear to be glowing. I adjusted the levels to be much darker than they would usually be set. This gave the photo a dark feeling...it also covered up the fact that he looked a little more like Harry Potter (with the purple robe and red/black striped polo) than a fearsome Jedi night.
Subscribe to:
Posts (Atom)